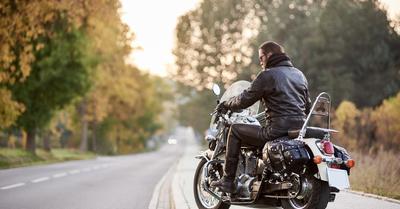

Part One: Safety First
It's easy to badly scrape yourself up in a motorbike accident, even if you're driving at parking-lot speed. So, wearing as much protective gear as possible sounds like good advice. Wear as much protective gear as possible, such as gloves, armored (padded) clothing, and boots, to ensure your safety. Even if you live in one of the places where wearing a helmet isn't mandatory for some or all motorcycle riders, it's always a good idea to do so. First things first, let's start with a helmet.
Helmet
The single most crucial item of motorcycle riding gear is your motorcycle helmet. In the event that your motorcycle crashes, it protects your head from injuries. The helmet must fit comfortably while maintaining your range of vision. There isn't such thing as the best helmet since they all have to comply with DOT (Department of Transportation) and ECE (Economic Commission for Europe) standards — which leaves you with the choice of the helmet's design.
Admittedly, it doesn't have to be the costliest helmet on the market. Both standards mentioned before are intended to protect your head in the unfortunate event of an accident and have thus undergone extensive testing to ensure that they meet safety standards for use on public roadways. Full-face or modular helmets are known to provide the most comprehensive protection.
We'd like to recommend a Bell Race Star Flex DLX full-face helmet, as it has everything bike riders want to see in a helmet. It's equipped with plenty of additional features, like removable cheek pads, optimized aerodynamics, and speaker pockets, while also offering plenty of safety, thanks to its design. It's one of the best helmets on the market, but it does come with a steep price tag.
AGV Sportmodular Carbon Tricolore Helmet is our choice for the modular helmets, as it's a lightweight, sporty touring model. The ventilation is great, and so are the lining, the noise levels, and levels of comfort. Admittedly, some of its mechanisms require a small break-in period to achieve smoother operation, but the pros obviously outweigh the cons. Everything about this helmet is great, except for its price — which is well above the $500 range.
For those looking for more affordable models, we'd like to recommend an AGV K1 Helmet or a Sedici Sistema II Helmet — both of which provide maximum safety, with improved features packed in a sleek design. Of course, our recommendations are based on our personal preferences, and you're welcome to find a helmet that fits your style and price bracket.
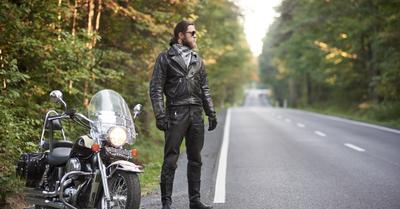
Jacket
Motorcycle jackets, usually made of leather or synthetic materials, such as Kevlar, are used to protect your torso, not just from the elements but also in events of accidents, by protecting your inner organs. Look for a jacket with body armor that absorbs impact. If the jacket has a CE (Certified European) mark, it has passed European certification standards. The finest motorcycle jacket fit is snug through the torso with enough arm movement.
Consider the riding conditions in which you'll be wearing this jacket so that its weight and features are appropriate. Warmer-weather jackets, for example, have more zippers and vents to allow for better airflow around the body. If you go for a leather jacket, make sure it's made for motorcycles. Regular leather jackets aren't designed to keep you safe.
As stated above, jackets offer protection from the sun, wind, precipitation, and cold temperatures. Staying comfortable helps you stay attentive and enjoy the ride. 4-Seasons jackets, as their name implies, work best in mild conditions across all four seasons while also offering a good amount of protection.
We'd like to recommend the Alpinestars Stella Yaguara Drystar Jacket to bike-riding ladies out there, as it's not only stylish but also features a durable textile shell with waterproof membranes that resist abrasion and water ingress. Any impact energy is absorbed by CE level 2 armor at the elbows and shoulders. To complete the impact protection, consider adding chest and back armor to the corresponding pockets, or opt for airbag protection by adding the Tech-Air Street Vest (sold separately).
For men, the REV'IT! Dominator 3 GTX Jacket features a clean design, ventilation enhancements, and three-layers waterproofing. GORE-TEX PRO 3-layer reinforced Armacor fabric adds extra durability and abrasion resistance to the shoulders, while award-winning SEEFLEX CE level 2 armor in the shoulders, elbows, and back keeps you safe. The downside of this jacket is its price, which is only a couple of dollars shy of entering the $1,500 range.
For those looking for more affordable options, Dainese D-Explorer 2 Gore-Tex Jacket (men) and Olympia Expedition 2 Women's Jacket (women) are great alternatives. Both jackets are made of sturdy materials for optimum protection and multiple weather conditions and terrains.
Pants, Boots, and Gloves
These pieces of gear improve riding safety and comfort. Your feet and ankles are protected by boots, while gloves shield your hands from harm, and pants protect your hips and legs from the elements.
REV'IT! Defender 3 GTX Pants for men go well together with the aforementioned jacket. We're discussing 4-season, CE Level 2 pants with knees and hips protection armor. For the ladies, Revit Xena 3 Women's Pants are sporty leather motorcycle pants with knee patches that hide knee pucks, which are sold separately.
When it comes to boots, it's really a matter of personal preference and riding conditions, but we can all agree on one thing — feet may withstand a lot of punishment while riding. Motorcycle boots with an integrated metal toe cover your ankles and have non-slip soles. To see how your boot will behave in a crash, grip the toe and heel and twist them together. In an accident, the less easily it turns, the more protection the boot provides.
The Forma Adventure Low Boots are an ideal choice for men; they feature a vintage leather finish paired with breathable and waterproof inside to keep your feet cool and dry. The dual-density sole provides excellent grip on the bike and provides a pleasant and grippy walking surface while off the bike. Impact protection is provided by integrated TPU inserts and reinforcements.
TCX Blend WP Women's Boots are a fantastic choice for the ladies, as they blend style and protection into a comfortable all-rounder that can be worn on or off the bike. Full-grain antique leather, a waterproof liner, and ankle and heel reinforcements provide unmatched comfort and safety while maintaining the vintage combat boot appearance that has been beloved since, well, forever.
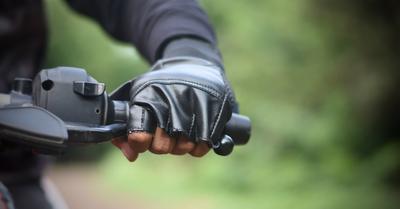
For gloves, we'd like to recommend Firstgear Ultimate Touring Heated Gloves because of their knuckle armor, which protects your fingers in the event of a crash. These have a layer of insulation to keep you warm and are made of top-grain cowhide for durability. The gloves contain a breathable waterproof membrane on the inside, reinforced palm protection, and pre-curved fingers that provide comfort from the first moment you put them on.
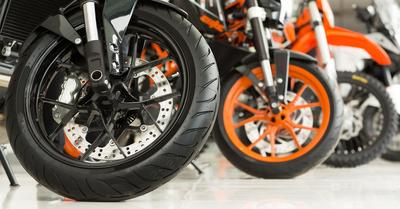
Part Two: Inspect the Bike
Regularly inspecting your motorcycle will keep it in good working order and keep you safe while riding. Check your bike at least once a week and before each ride. Pay attention to the following:
- Tires — Check the air pressure and look for any wear.
- Fluids — Always make sure you have the right oil and fluid levels; otherwise, you risk damaging the bike.
- Headlight and taillights — Verify that both lights are operational before each ride.
- Turn signals — Check your turn signals to ensure that both the front and rear signal lights are operational.
- Battery — Check the condition of your battery and make sure it's securely fastened. (You can attempt jump-starting it if it's dead.)
- Chain or belt — Inspect the tension and lubrication of your chain or belt.
- Clutch and throttle — Check your clutch and throttle for tightness and smoothness, and make sure your throttle springs back after you twist it.
- Mirrors — Adjust your mirrors so that you can see as much of the lane behind you as possible, as well as the lane next to you.
- Brakes — Check each brake separately before each ride. When completely engaged, each brake should feel strong and be able to keep the motorcycle in place.
- Horn — To see if your horn works, press the button on it.
If everything's operational, you're good to go; let's go over steps on how to ride a bike.
Part Three: Learn How to Ride a Bike
Now that you know how to prepare for a ride, it's time to get on the bike. However, if you've never done this before, we advise you to take a motorcycle safety course beforehand.
Take the Motorcycle Safety Course
The best way to acquire good riding technique and safety is to take a course — it's a highly recommended starting point for new riders. It is only required for your driver's license in select states; thus, whether you actually need it depends on where you live.
A basic rider course is available for new riders with little or no experience. Contact your local government's DMV to see if classes are available in your area. These might not always be accessible in your area; however, non-government courses are frequently accessible year-round. If you don't have a motorcycle, a training course may be able to give you one. You will also learn the fundamentals of operation and safety during the session. Many courses have both a classroom and a riding component, culminating in a test to obtain your license.
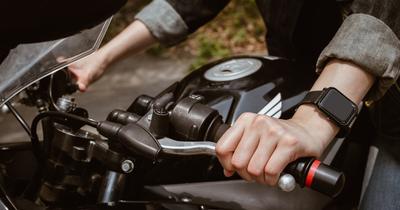
Learn the Controls
You won't get far on your motorcycle unless you know how to operate all of the controls. While we've listed some of the most basic motorbike controls below, you should always refer to your owner's manual for more information on how to operate your bike. Here are the basics:
- Throttle — The throttle is located on the right handlebar and controls the bike's speed. Twist the throttle towards you to accelerate; twist it away to slow down. The throttle should return to its original position when you release it.
- Front brake lever — On the right handlebar, the front brake lever is located in front of the throttle.
- Rear brake lever — The rear brake lever is located near the right footrest. To apply the brake to the back wheel, press it down with your foot.
- Clutch — The clutch is located on the left handlebar, directly across from the front brake lever. To change gears, you must pull the clutch. The clutch engages in its regular position automatically. Simply squeeze the clutch to disengage.
- Shift lever — The shifter is responsible for changing the transmission's gears. Move the lever up and down with your foot near the left footrest to pick the desired gear.
- Ignition switch — The ignition switch activates or deactivates the bike's ignition system.
- Starter button — After turning on the ignition, you press the starter button to get your bike started. The starter is located next to the throttle on the right handlebar.
Get on the Bike
Finally, some real action. To properly mount your motorcycle, approach it from the left side. Swing your right leg over the seat and grab the left handlebar. Firmly place your feet on the ground. Get a sense of how you'll fit on the bike. Grip the handlebars, clutch, and brake levers with both hands. Make sure you can comfortably reach these controls.
When clutching the handlebars, your arms should have a tiny bend in the elbow, and your fingers should be able to reach the switches easily. Make sure your feet are firmly planted on the ground. Get a sense of the bike's weight underneath you. You should also be able to manipulate the rear shifter without having to lift or slide your foot off the peg.
Feel the Clutch
The clutch is used to shift gears on your bike. When you pull the clutch, you're disengaging the bike's engine from its transmission, thus putting the bike in neutral, regardless of the gear it's actually in. This operation allows you to switch gears. Think of it as a dimmer switch; instead of using it as an "on-off" switch, you want to gently pull and release the clutch to avoid stalling your bike.
To start, pull in the clutch and shift the bike into 1st gear with your left foot. Most motorcycles shift "1 down, 5 up." 1st gear, neutral, 2nd gear, 3rd gear, etc. Your gauge will light up when you shift gears. When driving, disengage the back wheel by engaging the clutch with your left hand. Reduce the throttle as you clutch to avoid jerking when re-engaging the back wheel. Shift gears with your left foot and smooth the throttle with your right hand. Finally, disengage the clutch and engage the back tire.
Start Your Engine
To start your engine, pull the clutch lever all the way in and look for the kill switch — typically a red switch on the right handlebar. Flip it to the "on" position. Most modern bikes do not require you to kick start your engine, but you may need to do so if you have an older bike. If your bike has one, the kick start lever is located behind the footpeg on the right side.
Once the kill switch is set to "on," turn your key to the "ignition" position and check to make sure the lights and gauges are on and operating. Set the gears on your bike to neutral. Downshifting to 1st gear and then shifting up once is the simplest way to do this. Look for your gauge's "N" to light up. Push the "Start" button with your right thumb. This is typically found beneath the kill switch. A circular arrow with a lightning bolt in the middle is commonly used to identify start buttons.
Allow your bike to warm up for around 45 seconds after the engine has turned over to ensure good operation. Next, pull the clutch lever back in when your feet are flat on the ground. Then roll back onto your heels and repeat until you've mastered the clutch.
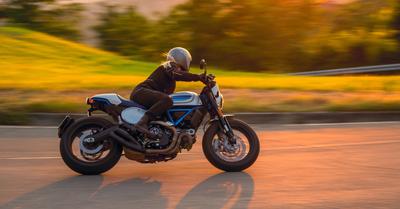
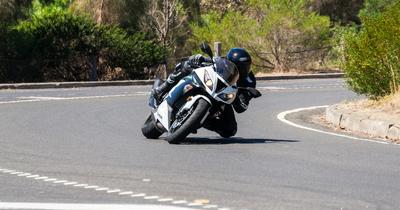
Part Four: Riding Your Motorcycle
It's time to get on the road now that you've gone over all of the phases in learning to ride a motorbike. Pull the clutch lever, change into first gear with the shifter, carefully release the clutch, and gradually twist the throttle. Put your feet up on the pegs as the bike accelerates forward. Sounds simple, but let's take it step-by-step:
Begin Driving
You can start riding once the engine has started and warmed up but not before checking whether your kickstand is still in place. As explained in Part Three, get on the bike and kick the kickstand up if it's down. Engage the clutch, shift into first gear, and slowly disengage the clutch until the bike begins to roll forward. To keep your bike from stalling while disengaging the clutch, you may need to pull back on the throttle slightly.
Accelerate slightly once you're moving and pull your feet up onto the pegs. Try riding in a straight line. Continue riding in a straight path while letting the clutch out and slowly rolling the throttle back to pick up a little speed.
Practice Shifting Gears
Get a feel for shifting once you are able to ride in a straight line. You should also practice shifting to get a sense of the "friction zone" — the area where the clutch engages and creates resistance. This section is where power is transferred from the engine to the rear wheels. Motorcycle transmissions are sequential, which means you must shift one gear in a row, whether you're going up or down.
To be able to feel and hear when it's time to shift, you'll need some experience and a lot of practice. Generally speaking, the engine will begin to rev higher when it's time to shift gears.
Practice Slowing Down and Stopping
Now that you've learned how to start and ride a bike, you must be able to slow down and come to a complete halt. Remember that the front brake is operated by the lever on the right handlebar, while the back brake is operated by the brake on your right foot. As a rule, you should start braking with your front brake and then use your back brake to help you slow down and stop.
When coming to a complete stop, use your front brake first and then your rear brake after you've slowed down a bit, and make sure to downshift when you slow down. Also, don't forget to engage the clutch when braking and downshifting. Apply the brakes while releasing the throttle. The fact that the front brake handle is located so that you must roll your hand forward to reach it makes this simple.
When you've come to a complete stop, activate the front brake and plant your feet firmly on the ground. Begin with your left foot and work your way to the right. Congratulations, you just learned how to ride a bike.